
Body Massage for Back Pain: A Complete Guide to Pain Relief
You bend down to pick up a grocery bag, sit through long hours at work, or wake up after a full night’s sleep only to feel a sharp ache in your back.
Table of contents
Share this article
Learning how to do bridal makeup step by step is essential for creating a flawless, long-lasting look that stays fresh throughout your wedding day. From preparing your skin to setting your makeup for all-day wear, each step plays an important role in achieving a natural finish that looks beautiful both in person and in photographs
Have you ever spent hours perfecting your makeup, only to see it look patchy, oily, or completely different in photos? Now imagine that happening on your wedding day.
It is one of the biggest beauty concerns brides face. Bridal makeup needs to stay fresh from the first bridal portrait to the final dance.
In this guide, you’ll learn how to do bridal makeup like a professional, applying makeup in the correct order, and expert tips to ensure your bridal look lasts from the ceremony to the reception.
Bridal makeup involves preparing the skin, applying a long-lasting base, enhancing the eyes and facial features, and setting the makeup with waterproof and transfer-resistant products. Following a step-by-step bridal makeup routine helps create a flawless look that lasts throughout the wedding day.
Beautiful bridal makeup starts with healthy skin. Even the most expensive foundation will struggle to look flawless if the skin underneath is dehydrated or textured.
The night before your wedding, gently exfoliate your skin to remove dead skin cells and improve texture. On the wedding day, cleanse your face with a hydrating cleanser that removes excess oil without stripping moisture.
Follow with a facial mist containing ingredients such as rose water or hyaluronic acid. While your skin is still slightly damp, apply a lightweight moisturizer and allow it to absorb fully.
Do not forget your under-eye area. A caffeine-infused eye cream can reduce puffiness and create a smoother base for concealer.
For example, if you are having a morning wedding after several days of pre-wedding celebrations, lack of sleep can often make the under-eye area appear tired. Proper skincare preparation helps create a fresher and brighter appearance.
Giving your skincare products five to ten minutes to settle before applying makeup helps prevent pilling and improves overall wear time.
Primer acts as the foundation for your makeup and plays a major role in longevity. Instead of using one primer everywhere, professional artists often use different formulas for different areas of the face.
A mattifying primer works best on the forehead, nose, and chin where oil tends to build up. For the cheeks and outer areas of the face, a hydrating primer helps maintain a fresh appearance throughout the day.
Apply an eye primer across the eyelids as well. This simple step prevents eyeshadow from creasing and keeps eye makeup looking polished for hours.
When learning how to do bridal makeup step by step, proper priming is one of the most important techniques to master because it creates a smooth canvas for every product applied afterward.
These areas often experience the most movement and oil production during long wedding celebrations.
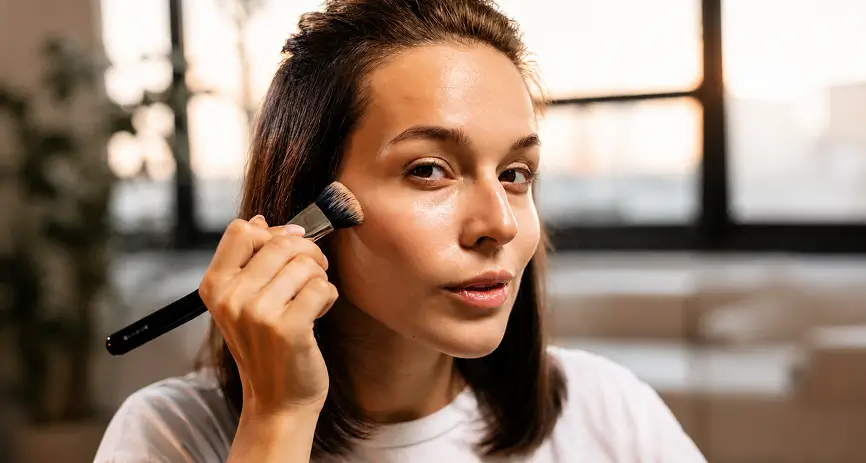
Foundation should enhance your complexion, not mask it. Choose a medium-to-full-coverage formula that accurately matches your skin tone and undertone. Avoid selecting a lighter shade to brighten your complexion, as it can appear unnatural in wedding photographs.
Use a damp makeup sponge and gently press the foundation into your skin. This technique creates a seamless finish that looks natural both in person and on camera.
For example, a bride with slight redness around the nose and cheeks can apply a thin first layer of foundation across the face and then add a second layer only where additional coverage is needed. This prevents the makeup from looking heavy while still providing a flawless finish.
Once your foundation is complete, move on to concealer. Apply a brightening concealer under the eyes to reduce darkness and create a refreshed appearance.
You can also apply small amounts to the center of the forehead, bridge of the nose, and chin for subtle dimension.
For blemishes, acne marks, or pigmentation, use a small brush to target only the affected areas.
This technique keeps your skin looking natural while still providing excellent coverage. The goal is for guests to notice your glow, not your makeup.
Setting your makeup correctly helps it last through the ceremony, photographs, and reception.
Use a finely milled translucent powder and focus on areas that tend to get oily first, such as the forehead, nose, and under-eye area.
Rather than sweeping powder across the face, gently press it into the skin. This method improves longevity while maintaining a smooth finish.
Brides with combination or oily skin may benefit from carrying a compact powder for small touch-ups later in the day.
A light hand is important because too much powder can make the skin appear dry in close-up photographs.
Foundation can sometimes make the face appear flat. Contour and bronzer help restore natural dimension and definition.
Apply a cool-toned contour beneath the cheekbones, along the jawline, and lightly around the nose. Blend thoroughly to avoid harsh lines.
Next, apply bronzer to areas where the sun naturally hits the face. This adds warmth and creates a healthy-looking complexion.
Finish with blush on the apples of the cheeks, blending upward for a lifted appearance.
Soft pinks, peaches, and rose tones remain timeless bridal choices because they complement most skin tones and wedding outfits.
For example, brides wearing ivory or pastel bridal outfits often look beautiful with soft peach blush, while deeper rose shades can beautifully complement richer bridal ensembles.
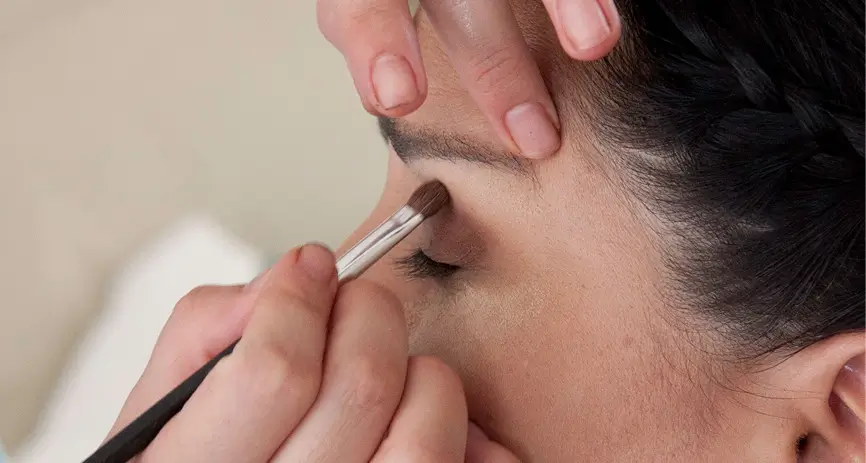
The eyes are often the focal point of bridal beauty and deserve extra attention.
Start with a neutral transition shade through the crease. Then add a slightly deeper shade to the outer corners of the eyes for depth and definition.
Apply a champagne, gold, or soft shimmer shade to the center of the eyelid to catch the light beautifully. Complete the look with waterproof eyeliner and mascara.
If desired, add natural-looking false lashes for extra definition without overwhelming the face.
This step is particularly important because wedding photographs often focus closely on the eyes during emotional moments.
Well-groomed eyebrows frame the face and balance your makeup.
Fill any sparse areas using light, hair-like strokes rather than harsh lines. Once you are happy with the shape, use a clear brow gel to keep everything in place throughout the day.
Natural-looking brows photograph far better than overly dramatic shapes and help create a timeless bridal appearance.
Long-lasting lip makeup starts with preparation. Gently exfoliate your lips and apply a lightweight lip balm. Once absorbed, line your lips with a long-wear lip pencil that matches your lipstick.
Fill in the entire lip with liner before applying lipstick. This technique improves wear time significantly.
Popular bridal shades include:
For extra dimension, add a small amount of gloss to the center of the lips. If you expect frequent outfit changes or a long reception, keep your lipstick shade in your bridal touch-up kit for quick reapplication.
The final step brings everything together. Mist a professional setting spray across your face in an X and T motion. This helps blend makeup layers seamlessly and improves durability.
Allow the spray to dry naturally without touching your face.
If you are following a step-by-step guide to bridal makeup, this final step should never be skipped because it helps keep your makeup fresh from the ceremony until the last photograph.
Many professional bridal makeup artists consider setting spray the insurance policy for the entire makeup look because it helps prevent fading, smudging, and excess shine.

Bridal makeup is not simply about applying products. It is about creating a look that reflects your personality, complements your wedding style, and lasts through every special moment.
Now that you understand how to do bridal makeup step by step, you can make informed decisions about your wedding-day beauty routine. Whether you prefer a soft natural glow, a glamorous bridal transformation, or a classic timeless look, the right preparation makes all the difference.
Every bride deserves a personalized beauty experience. At Kimera, our bridal beauty experts create customized makeup plans based on your skin type, facial features, wedding theme, and personal preferences.
Book your bridal consultation with Kimera today and take the first step toward your dream wedding look.
You bend down to pick up a grocery bag, sit through long hours at work, or wake up after a full night’s sleep only to feel a sharp ache in your back.

Have you ever spent time and money removing unwanted hair only to see it grow back within a few weeks? It is a common frustration.

Did you know? Studies suggest that prolonged exposure to UV rays, heat, humidity, and pollution during summer can weaken the hair cuticle, causing up to 30% more moisture loss compared to cooler seasons.
WhatsApp us